Moving your campaign to the new Trinity platform is a seamless process. Just follow the simple steps below and notify your account manager once done and Locafy will do the rest for you.
There are two ways for you to migrate you landing pages/proximity campaign across to the new Trinity platform. It just depends on what type of domain you have, a standalone domain or a sub-domain. We will go through both but rest assured it is a simple process and can be done in just a few moments.
This is designed so that you will experience zero downtime.
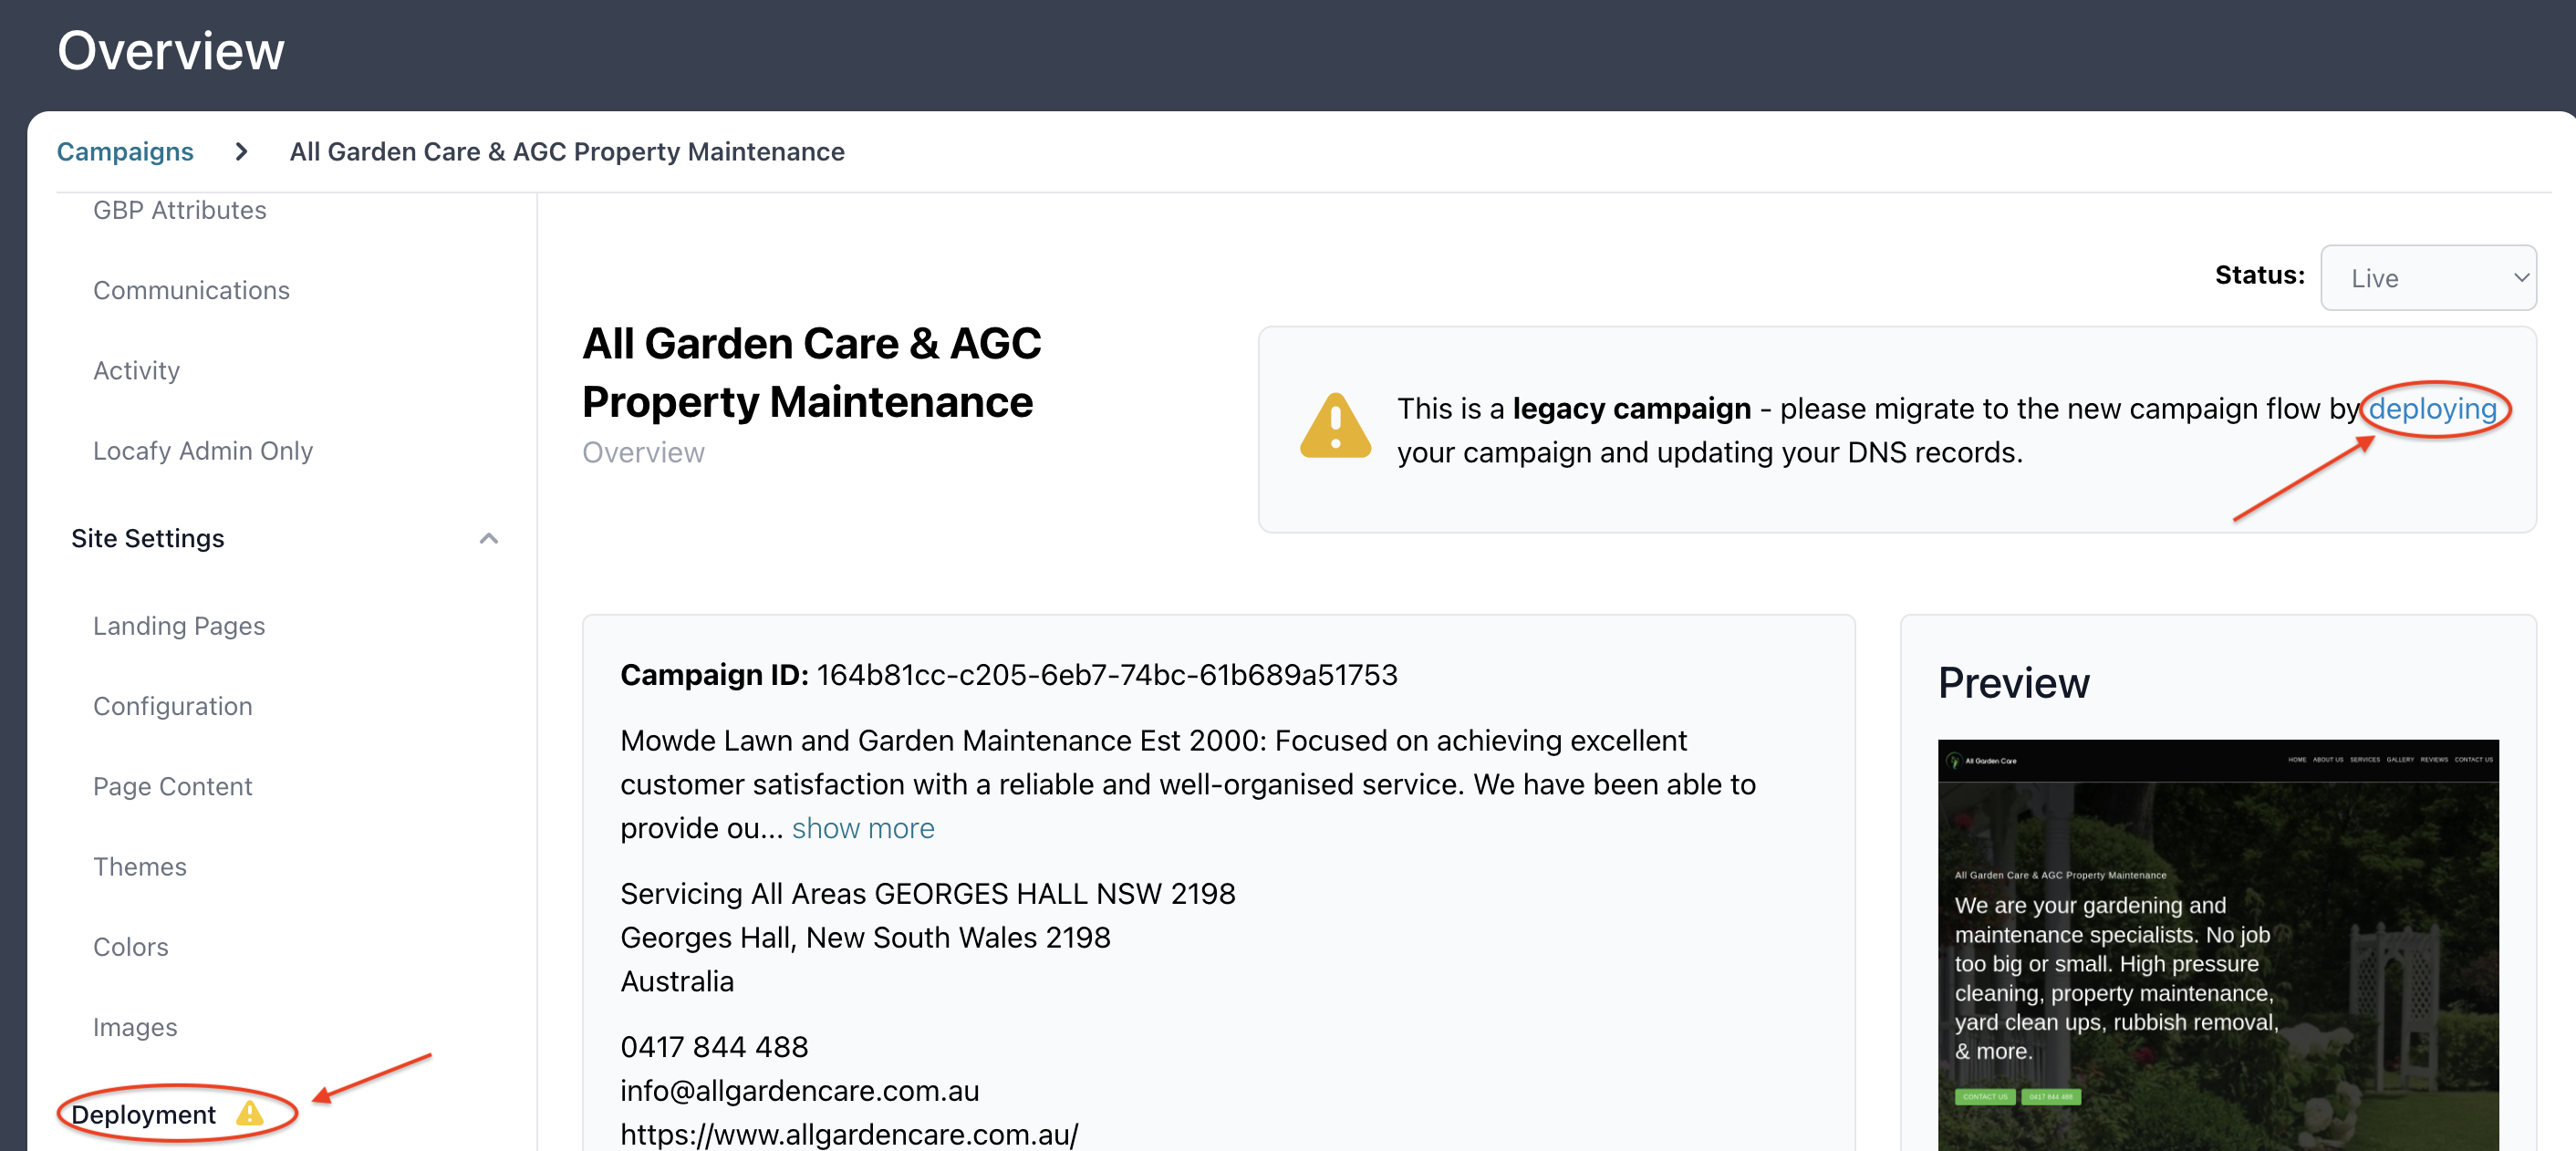
In order to clone and deploy your proximity campaign in Trinity, simply go to your campaign in your Locafy dash, you should see the following message or warning; click on either link highlighted below.

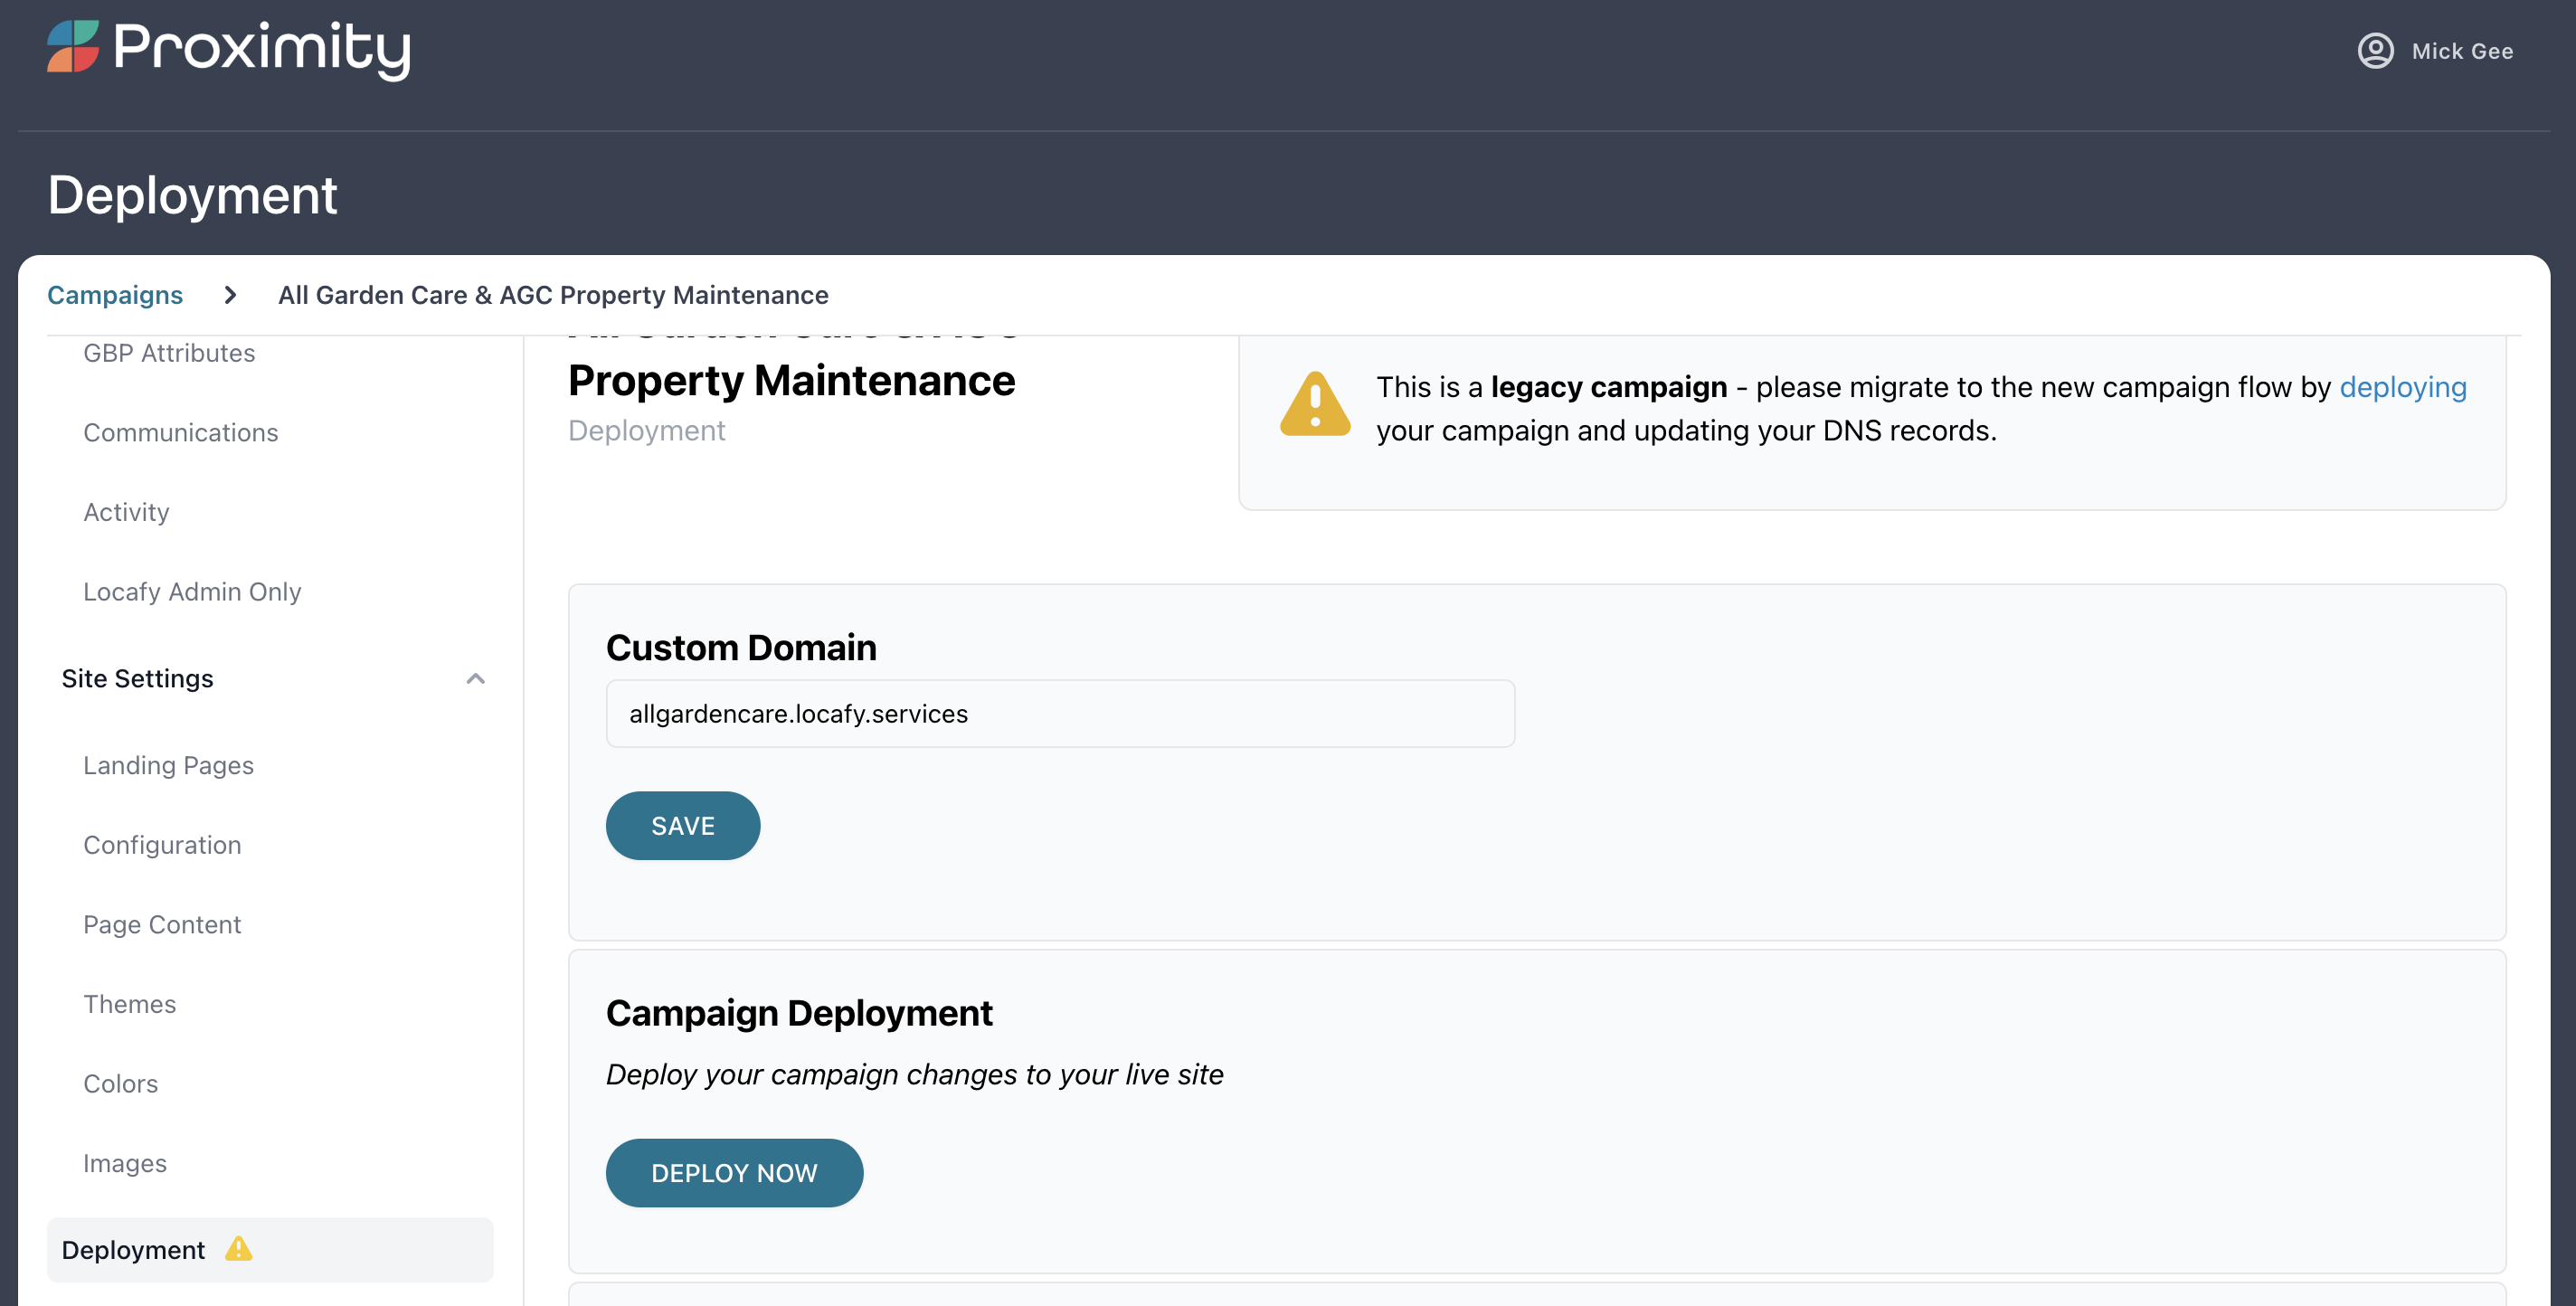
Once in deployment, confirm that the campaign URL is correct and click on 'DEPLOY NOW'

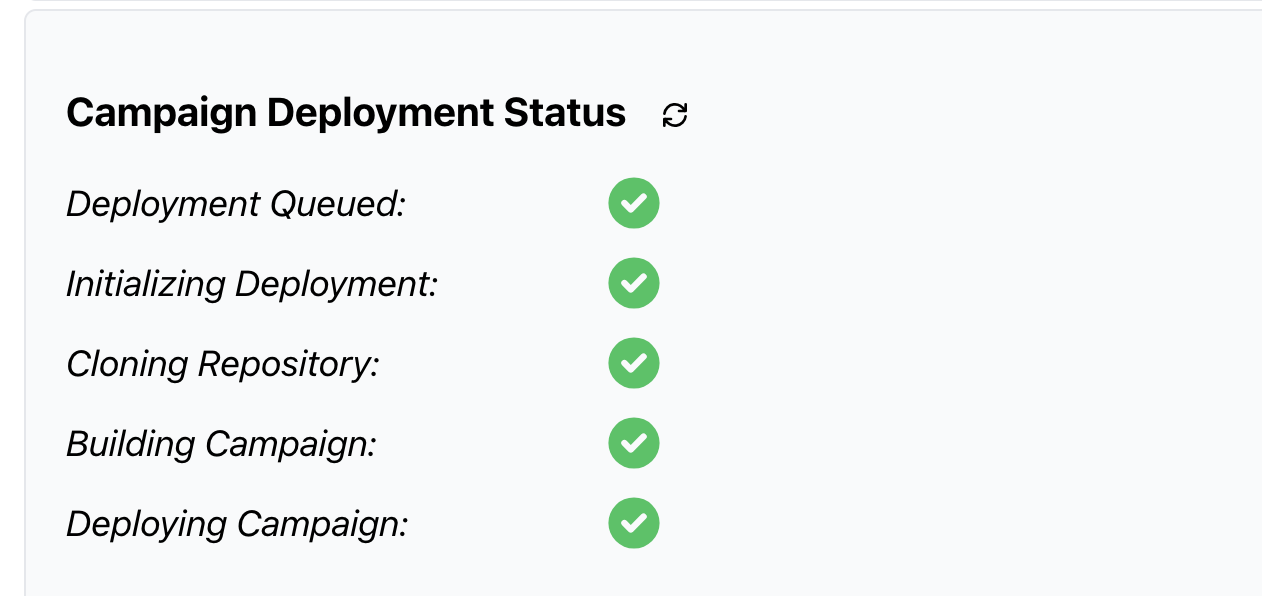
You will then be presented with a screen showing you the progress of the migration.

Once all the ticks have turned green you will then be given a DNS record to add. This record refers to subdomains only at this stage. It should like this (example only);
![]()
If you have a top level domain, please disregard the CNAME record and scroll down to the Stand Alone Domain section below for those instructions.
Once the changes have been made, your site will now be using the Trinity platform, please refer to this Locafy Knowledge Base article for further information on the improvements that Trinity provides.
1. Sub-Domain: This is the easiest of the two all you will need is access to the DNS manager of the domain. It is important to point out at this stage that we will no longer be using A Records for pointing a domain to, instead, we will be using a single CNAME record. It means that, moving forward, we will only be required to add a single record rather than two.
Step 1:In your dashboard you will see the CNAME record displayed in the deployment; proximity-abc-company.pages.dev
Step 2: Log into your DNS manager and remove the two A records in this case it maybe
local.abccompany.com all you need do is delete the two A Records
| Name | TTL | Type | Record |
| local.abccompany.com | 3600 | A | 52.27.96.232 |
| local.abccompany.com | 3600 | A | 54.69.13.213 |
Step 3: Add CNAME Record
| Name | TTL | Type | Record |
| local.abccompany.com | 3600 | CNAME | proximity-abc-company.pages.dev |
Step 4: Save your record
Step 5: Your Trinity site should be live within four hours (depending on the registrar)
2. Stand-Alone Domain: This is also a very simple procedure. The difference is that as this is a standalone domain you just need to change the Name Servers, there are just a couple of simple steps you need to do.
Step 1: Speak to your account manager or speak with support@locafy.com and let them know you are ready to move your campaign across.
Step 2: As above, deploy your campaign on to the Trinity platform.
Step 3: Log into your domain account
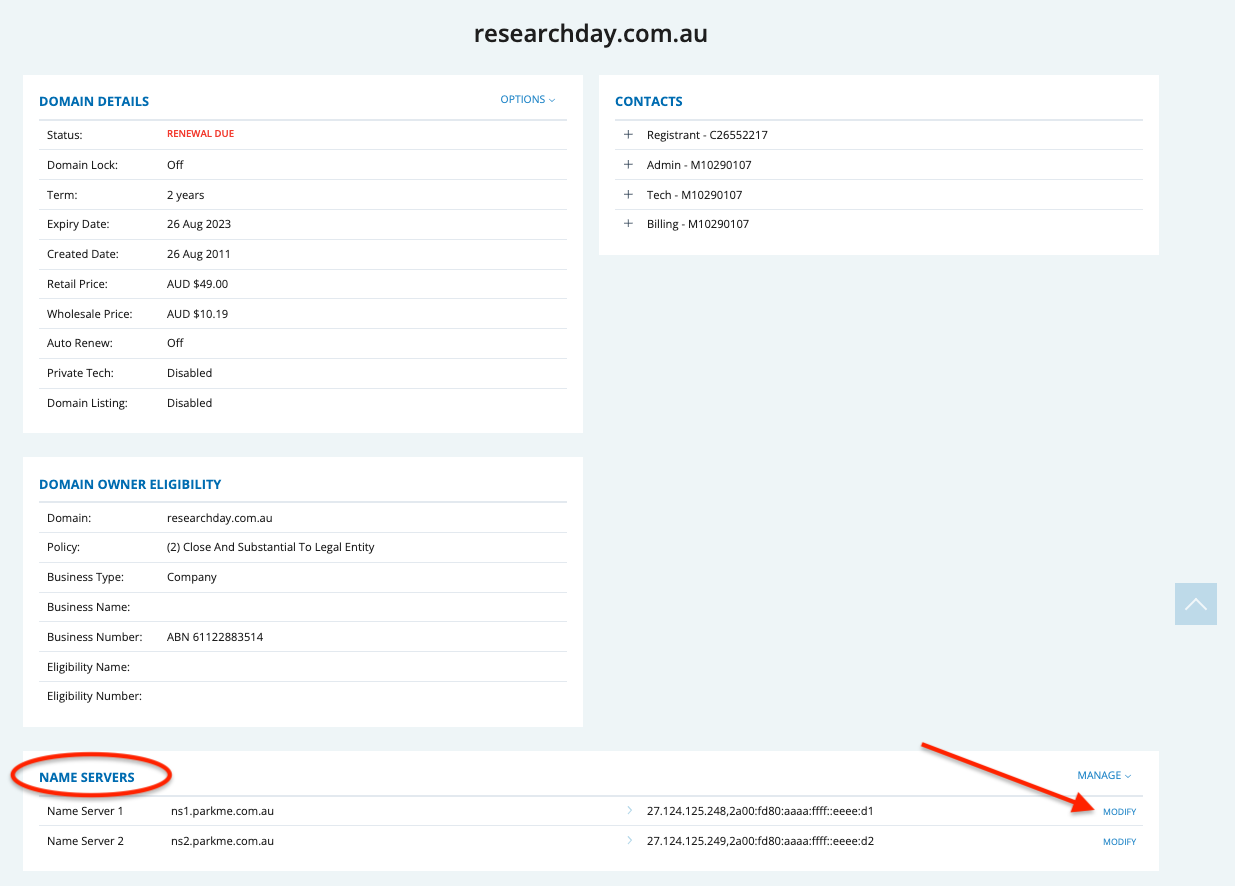
Step 3: Navigate your way to where your name servers are (example below) and click to modify.

Step 4: Add the new name servers (typically they will look just like the example below)

Step 5: Ensure you save the name server change
Step 6: Let your account manager know you have done this so that Locafy can complete the process.
This is all you need to do! Like we said, we want to make this as painless as possible for you and your customers.
Please contact your account manager or your support team at support@locafy.com if you have any questions.
-1.png?height=120&name=LFY002%20-%20Primary%20Logo%20-%20NEG%20-%20TRAN%20(1)-1.png)